Azure Automation: 180-Day Guest Inactivity Report
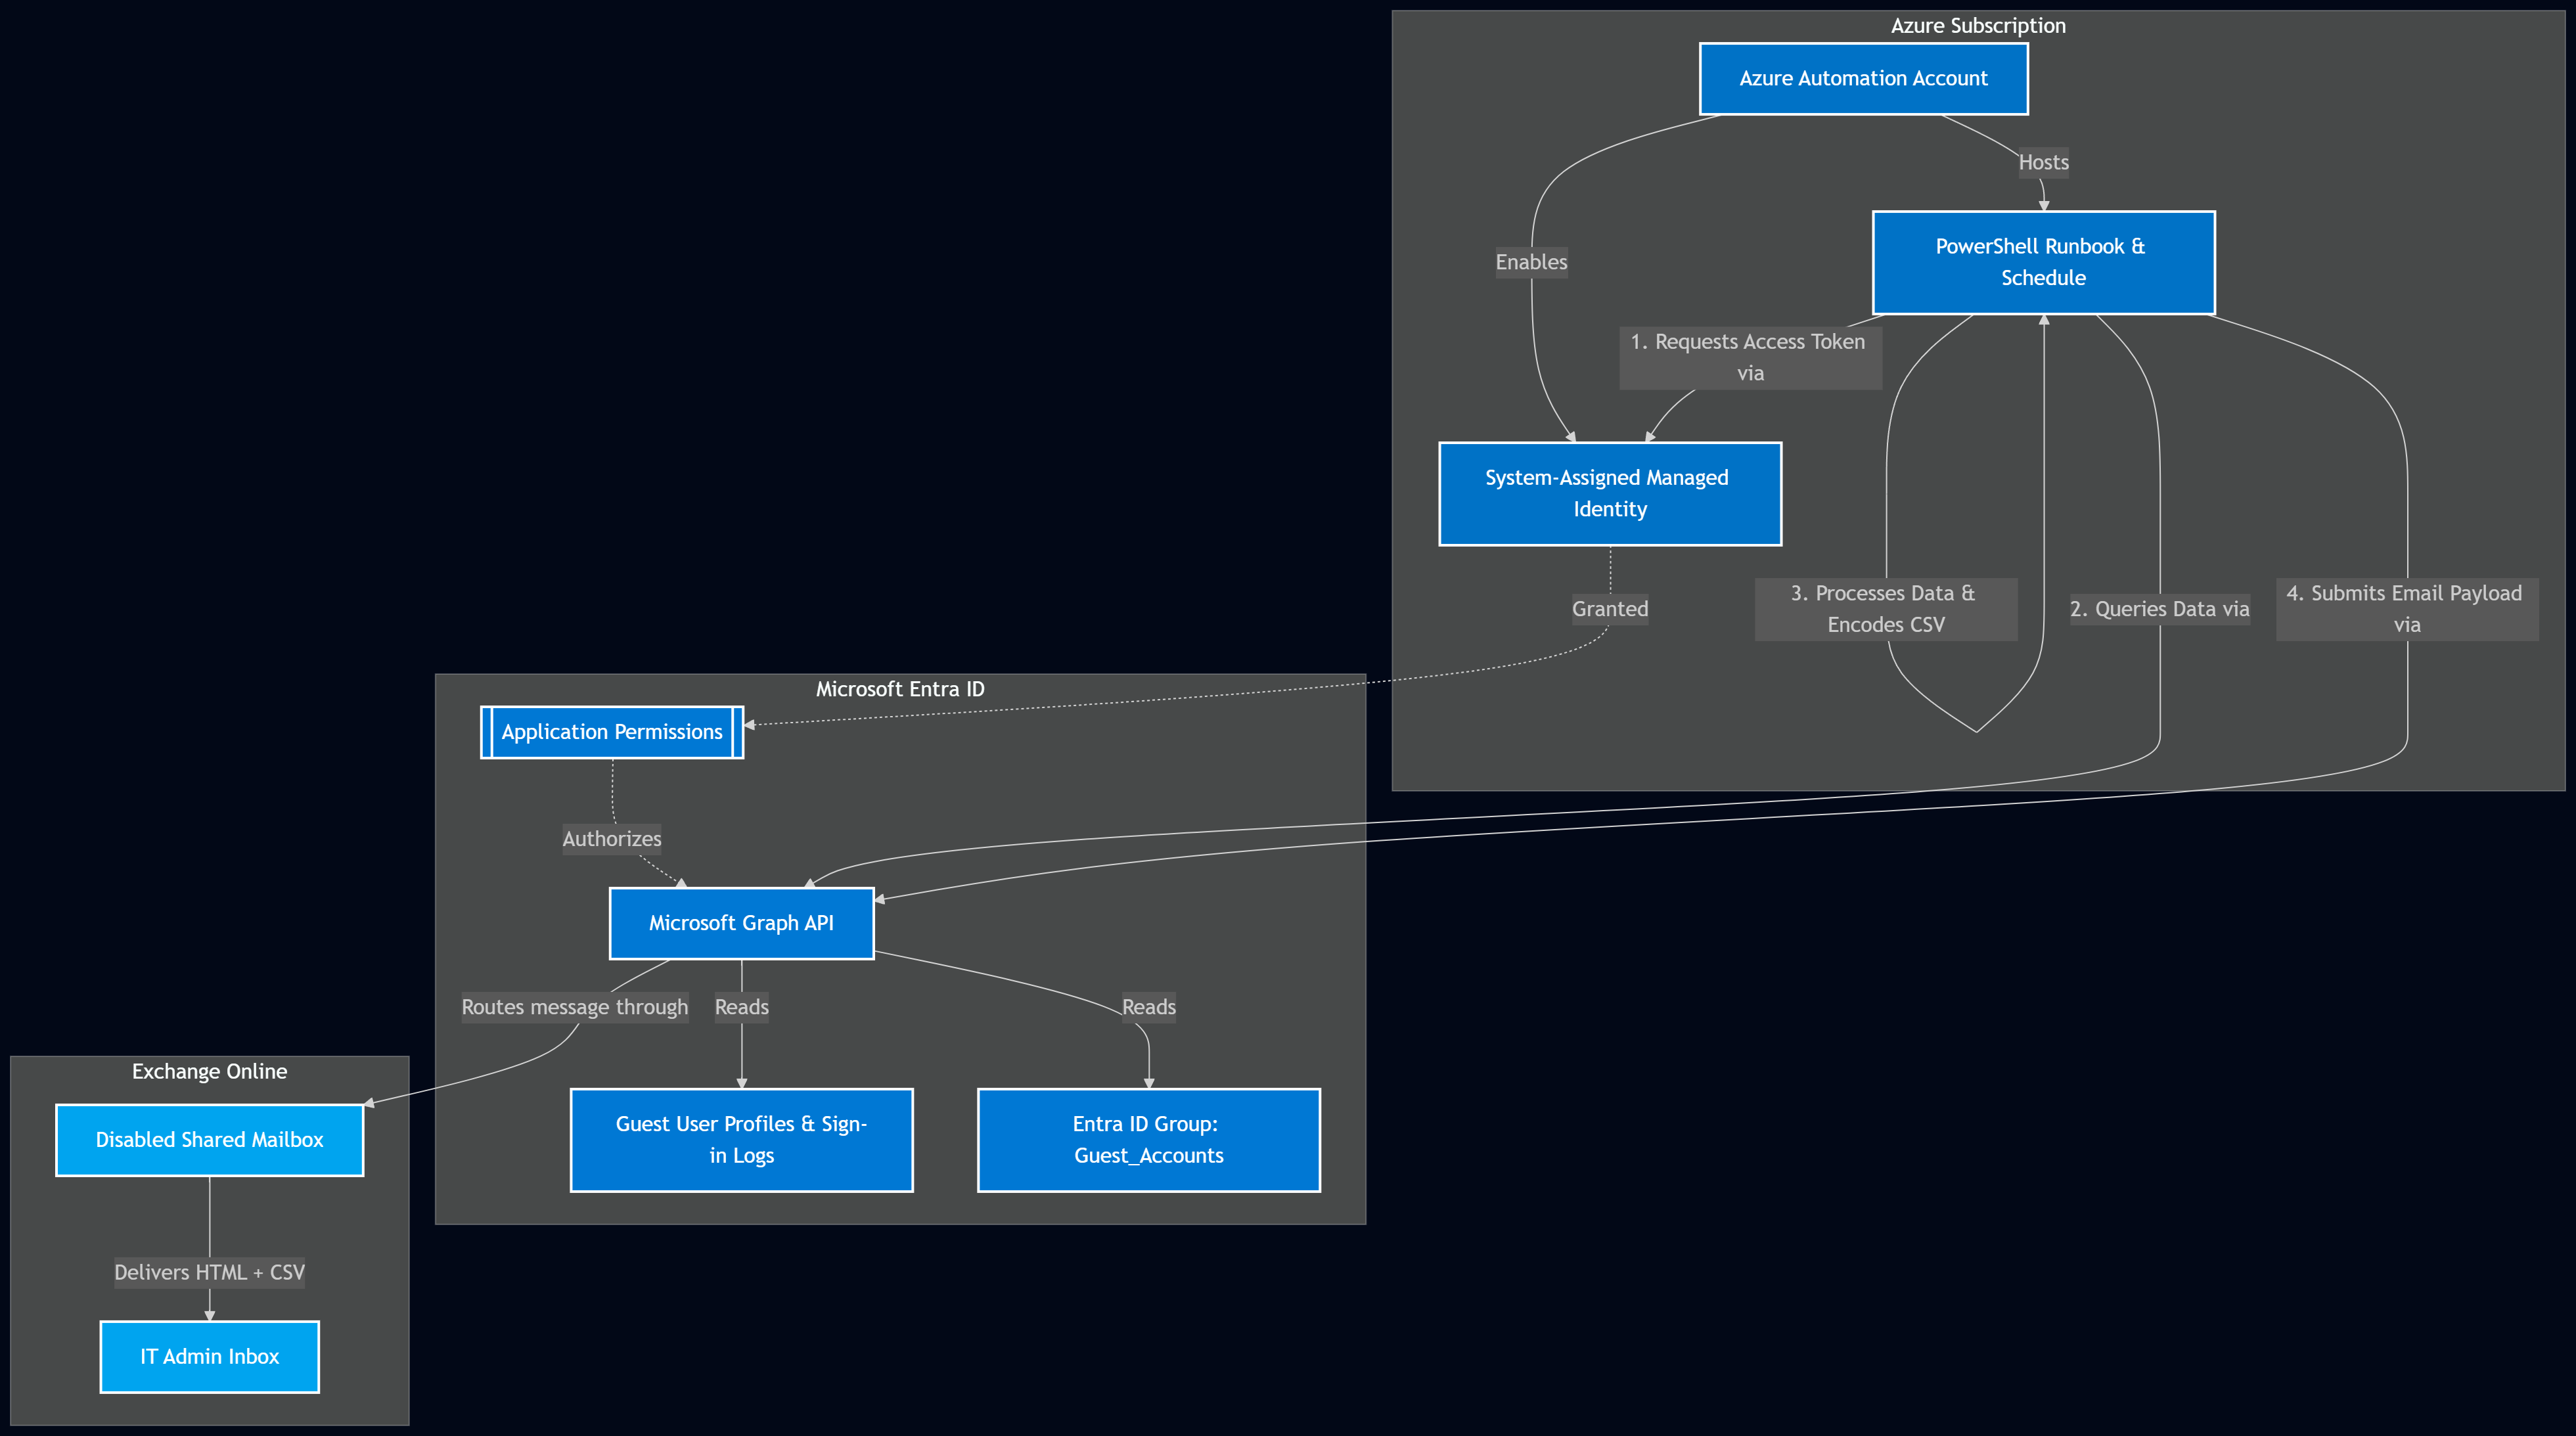
This guide explains how to set up an Azure Automation Account to automatically identify Guest users who have not logged in for over 180 days, and send a summary report via a Shared Mailbox.
This solution operates entirely headlessly using a System-Assigned Managed Identity and the Microsoft Graph API.
Prerequisites
- An active Azure Subscription.
- Global Administrator or Privileged Role Administrator rights (to assign Graph API permissions).
- A Shared Mailbox in Exchange Online.
- The Object ID of an Entra ID Group (if you want to filter out specific guests).
Architecture diagram
🔍 Click image to open full-resolution version in a new tab
Step 1: Create the Azure Automation Account
- Log into the Azure Portal and search for Automation Accounts.
- Click Create, fill in your resource group and naming details, and deploy the resource.
Step 2: Enable the Managed Identity
- Navigate to your new Automation Account.
- On the left menu, under Account Settings, select Identity.
- Under the System assigned tab, set the Status to On and click Save.
- Note the Object (principal) ID that is generated.
Step 3: Grant Graph API Permissions
Because you cannot assign Microsoft Graph Application permissions to a Managed Identity via the Azure Portal GUI, you must use PowerShell.
Open an administrative PowerShell console, ensure the Microsoft.Graph module is installed, download and run the script from this repository:
👉 Grant-GraphAPIPermissions.ps1
Be sure to replace
$AppNamewith the exact name of your Automation Account.
Step 4: Create the Runbook
- In your Automation Account, go to Process Automation > Runbooks.
- Click Create a runbook.
- Name it (e.g.,
Get-StaleGuestAccounts), set the Runbook type to PowerShell, and set the Runtime version to 5.1 (or 7.2). - Download the script from this repository: 👉 Get-StaleGuestAccounts.ps1
- Paste the code into the Azure Automation editor.
- Click Save, test it using the Test pane, and then click Publish.
Remember to update the configuration variables at the top of the script with your specific Group ID and email addresses.
Step 5: Schedule the Automation
Navigate to Shared Resources > Schedules and click Add a schedule (e.g., “Weekly on Mondays”).
Go back to your published Runbook, click Link to schedule, and attach your new schedule.